Indulge in the paradise-like flavors of our Pineapple Swiss Roll recipe. The soft, airy cake meets the tropical burst of pineapple, creating a symphony of taste and texture. Baking this delightful treat isn’t just an activity – it’s a journey into crafting happiness, one roll at a time.
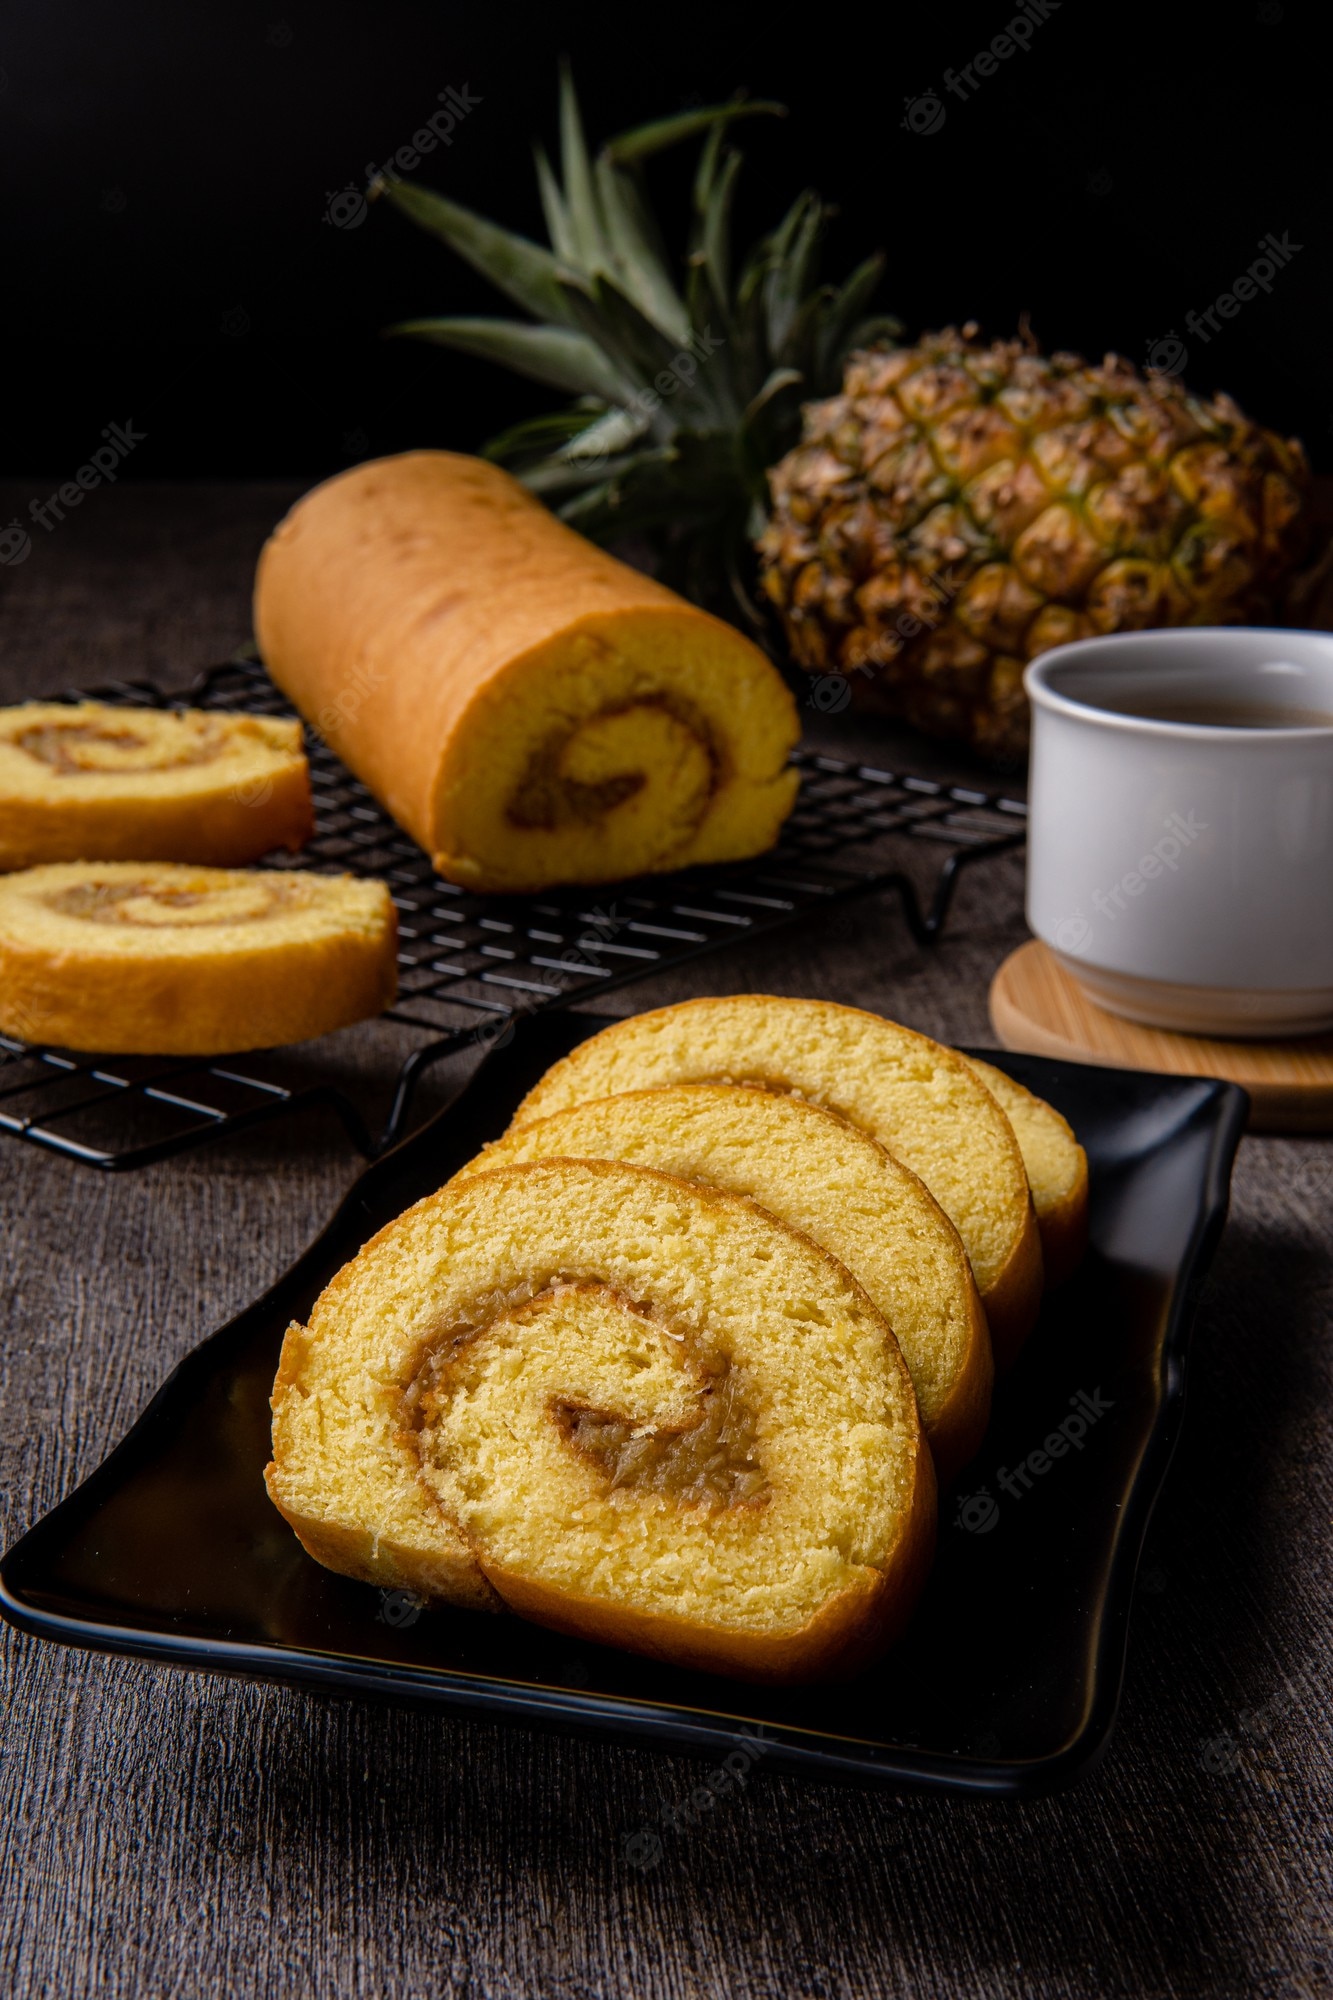
Pineapple Swiss Roll
The Pineapple Swiss Roll is more than a dessert; it's a journey into the heart of tropical delight. From its delicate sponge cake to the vibrant burst of pineapple, every slice tells a story of culinary artistry and the joy of indulgence. Whether it's shared with friends, savored in solitude, or presented at a special occasion, this roll encapsulates the magic of creating memories through food.
Ingredients
Equipment
Method
Swiss Meringue Buttercream
- Take the butter out of the refrigerator and cut into cubes.
- By the time we have whipped the egg whites, it would have warmed up enough to add to the meringue.
- In a thick ceramic bowl, mix the sugar and egg whites until just combined.
- Place it over a pot of simmering water, making sure the bowl is not touching the surface of the water.
- If it is, you can leave a wooden spoon between the bowl and pot to prevent contact.
- Cook the egg whites while occasionally stirring until the sugar is fully melted.
- Cook for another minute or two until the egg whites are looking foamy on top and have a sticky consistency when touched between two fingers.
- Make sure egg whites don’t boil. If you have a candy thermometer, it should register about 70 C.
- Remove the bowl from the pot and whip the egg whites on high until the egg whites reach stiff peaks.
- The mixture will be thick and glossy like marshmallow fluff.
- Check if the egg whites are cool to the touch. If not, refrigerate for about 5 to 10 minutes until cool.
- Once the mixture is cool, start adding the butter one cube at a time, waiting until the cube is fully mixed before adding the next.
- Once all the butter is added, add pineapple extract and yellow food colouring. Mix on high for 3 minutes until fluffy.
Decoration Batter
- Mix everything but the cocoa and food colouring together in a bowl.
- Divide the batter in the ratio 1:1:2 into 3 small bowls.
- Add 2 drops of yellow food colouring to the bowl with the most batter in it.
- Add 2 drops of green food colouring in another bowl.
- Add 1 tsp cocoa and 2 drops of black food colouring in the third bowl.
- Mix the contents of each bowl until the color is uniformly distributed.
- Spoon the batter into 3 separate piping bags and secure the bags with rubber bands.
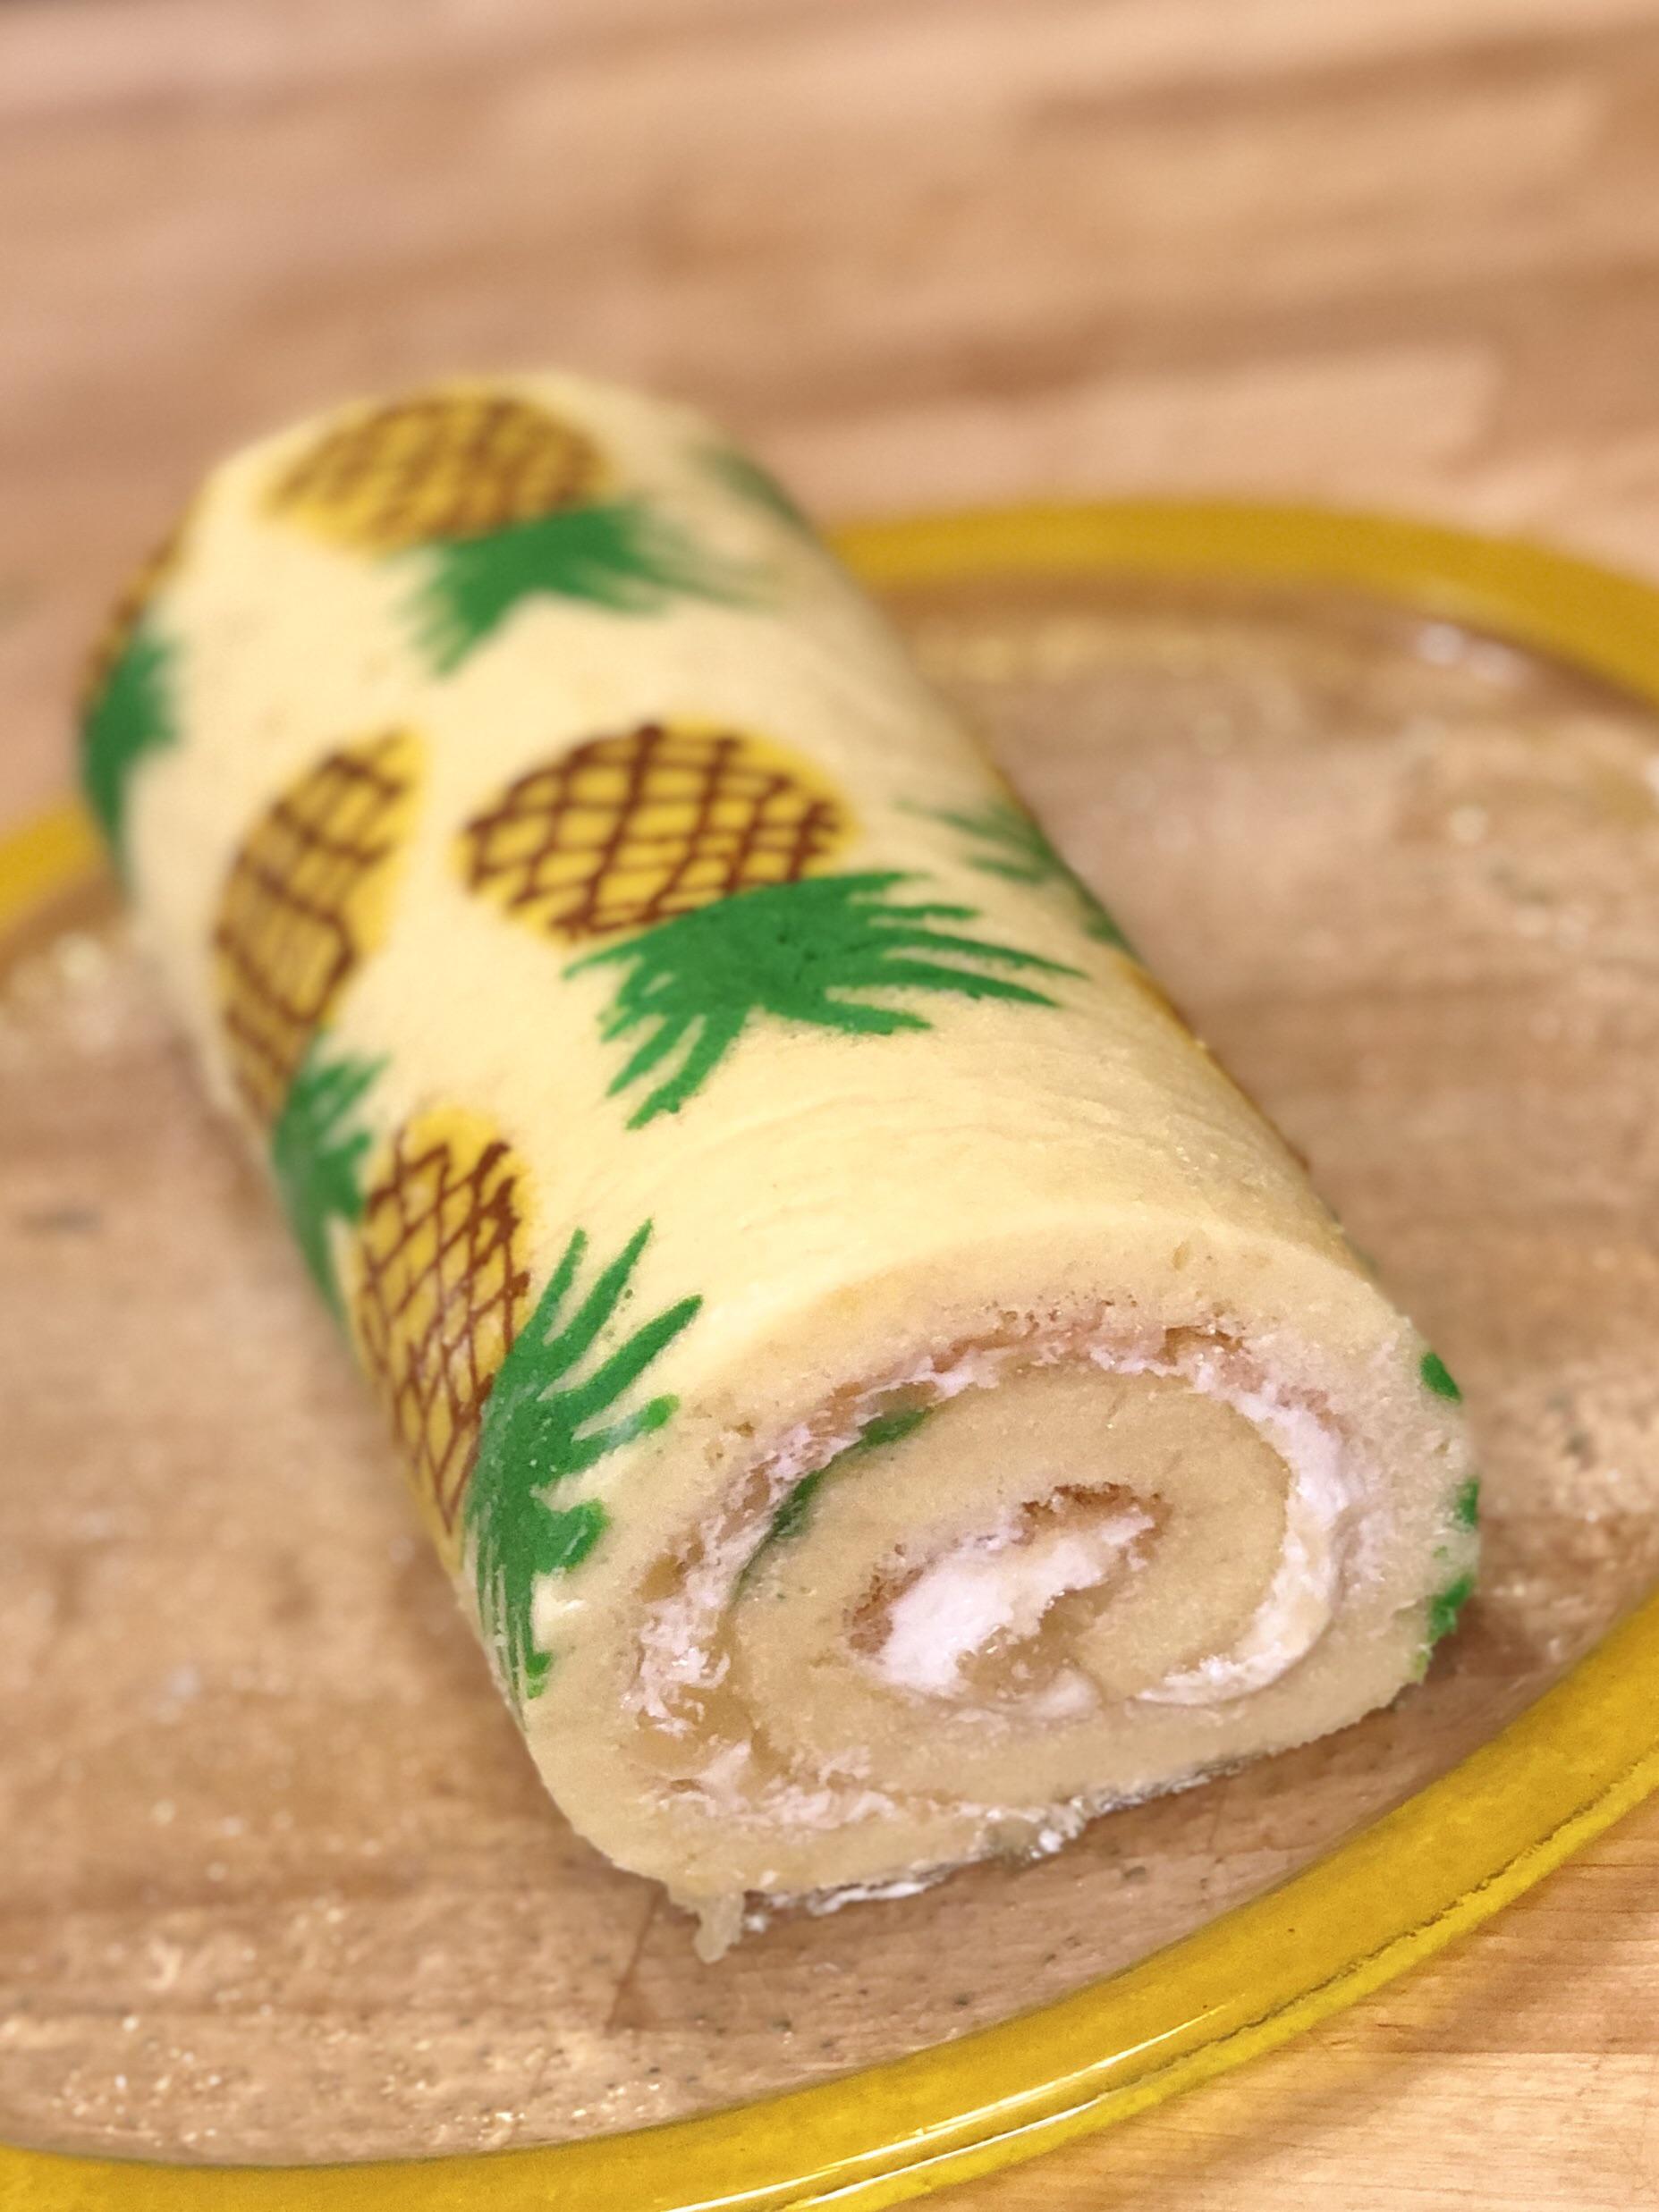
- Draw or print the design on a piece of paper and tape it into an 8 by 12 inch baking pan.
- Place a parchment paper on top of the design and use the black batter to pipe the design.
- Use the green and yellow batter to fill in the leaves and the flesh of the pineapple.
- Place in the freezer.
Sponge Cake
- Preheat oven to 190 C.
- Beat the yolks, half the sugar and the pineapple extract with a whisk until the mixture is pale and fluffy, around 3 minutes.
- Add the flour and fold it in.
- Add the melted butter and fold it in.
- In a separate bowl, whip the egg whites and the remaining sugar with an electric beater until it reaches firm peaks (between soft and stiff).
- Mix one third of the whipped egg whites into the yolk mixture until fully combined.
- Fold in another third with a spatula taking care not to deflate the whites. Fold in the last third.
- Take the baking pan out of the freezer and slide off the template and the tape holding it to the pan.
- Pour the sponge cake batter over the design and carefully smooth the top with a spatula.
- Bake for 11 minutes until the top is a light golden brown.
- Take the pan out of the oven and run a knife around the inside edges of the pan to release the cake. Let cool in the pan for about 15 to 20 minutes.
Assembly
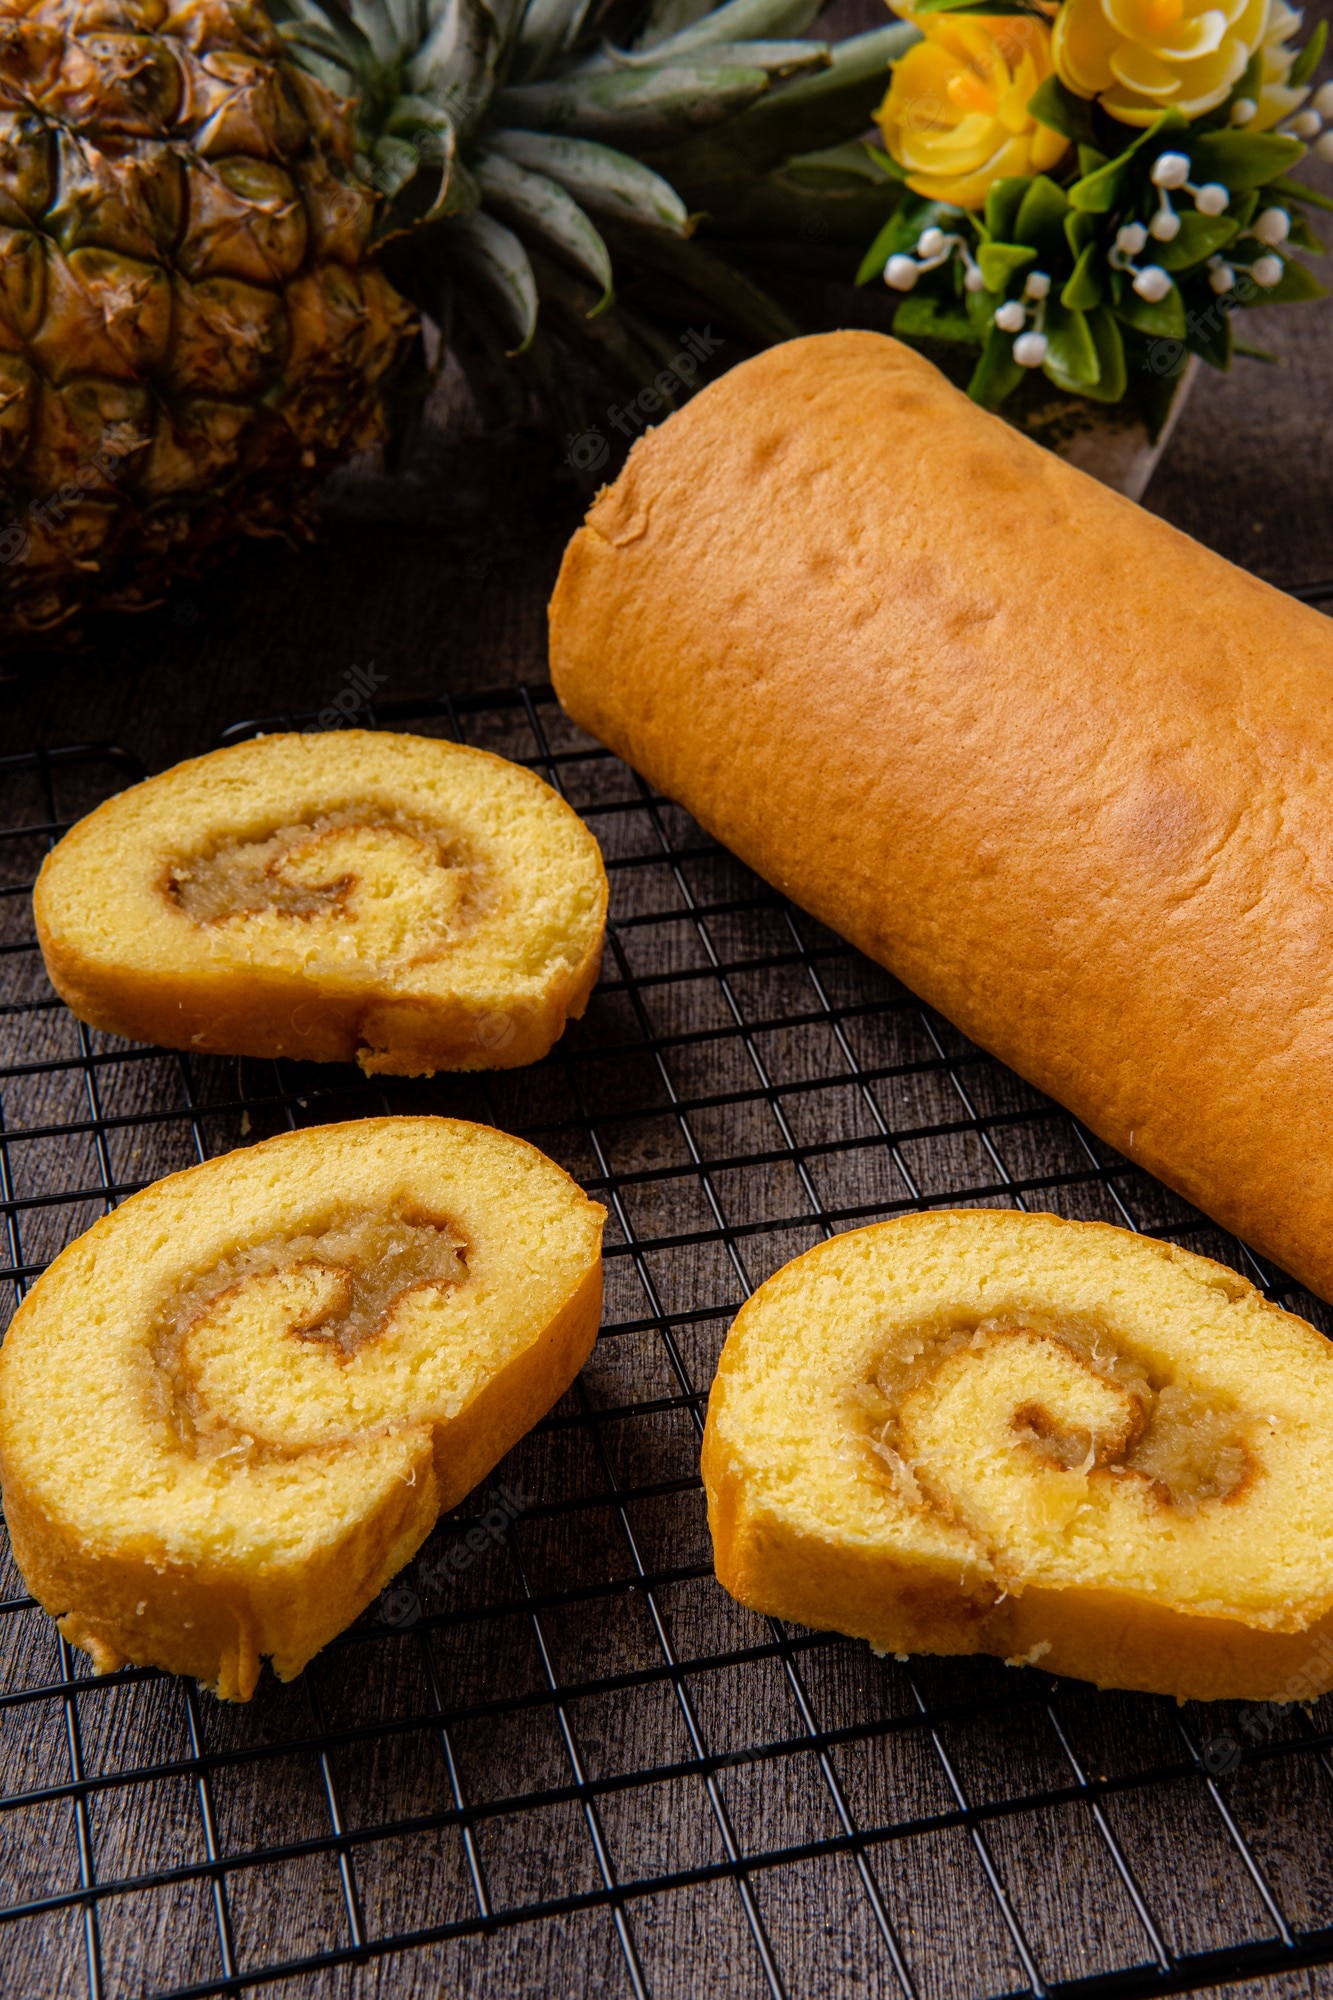
- Sprinkle powdered sugar and cornstarch over the cake. Place a large piece of parchment paper over a large baking sheet and flip the pan with the cake over it.
- Remove the pan and again flip it upside down. Roll the cake gently with the 2 pieces of parchment paper inside it.
- Cover it with a thin cotton towel and let cool until almost room temperature.
- Unroll the cake while leaving the end which stays inside the Swiss roll still rolled.
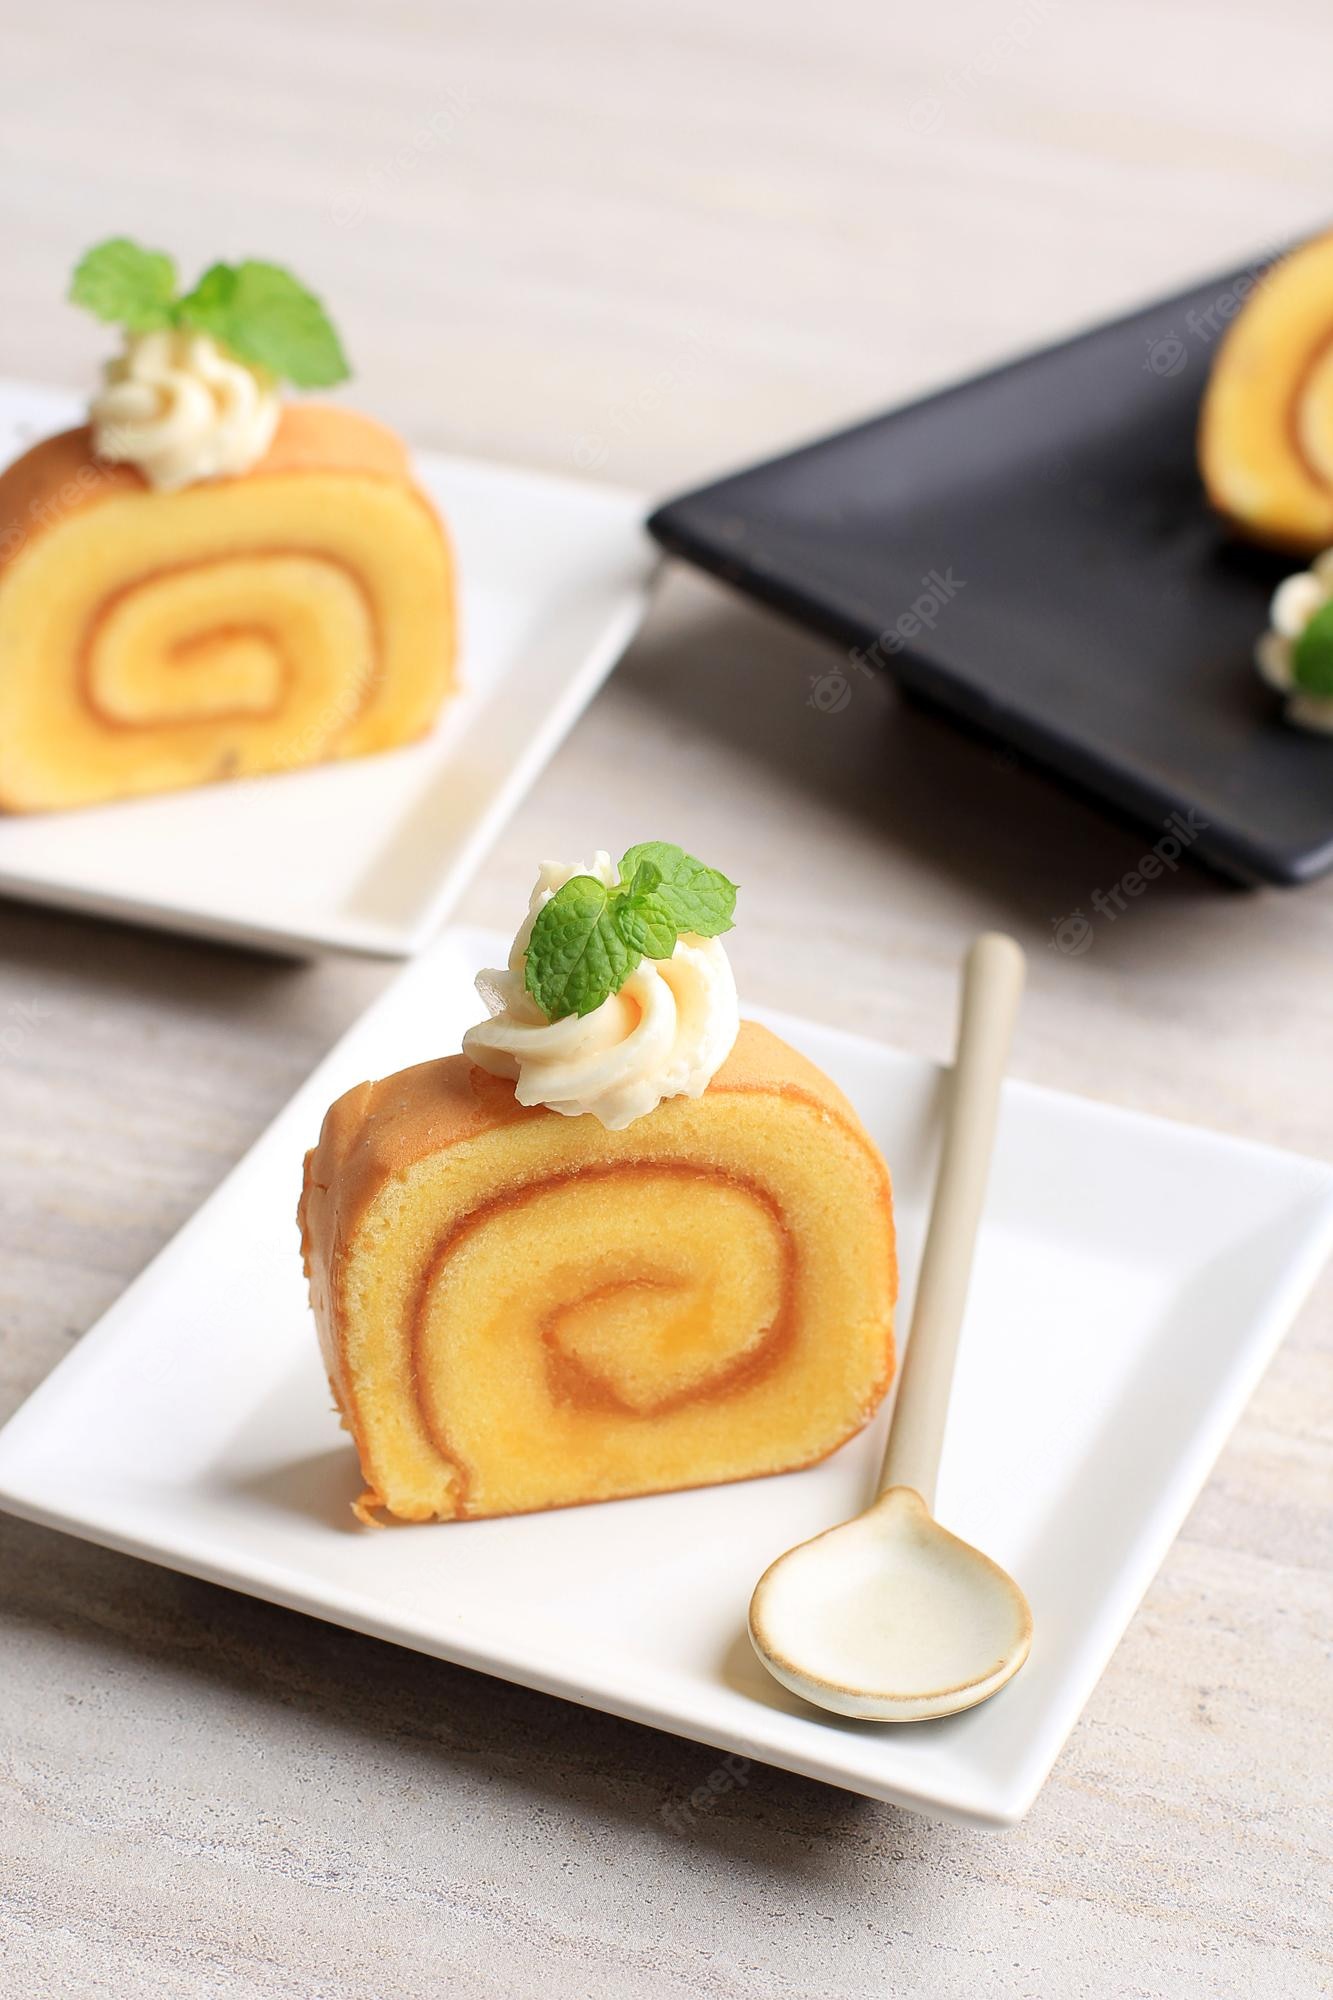
- Spread the SMBC evenly on the cake, making sure the full surface of the cake is covered.
- Place the pineapple pieces over the SMBC.
- Roll the cake back up, while peeling off the parchment paper at the same time.
- Wrap the roll in a large piece of parchment paper tightly and twist off the ends.
- Refrigerate for at least 2 hours before slicing and serving.
Video
Notes
- The sponge cake's lightness complements the pineapple's tanginess for a harmonious balance of flavors.
- Roll the cake gently while it's still warm to prevent cracking and ensure a smooth finish.
- A dusting of powdered sugar or a drizzle of pineapple glaze adds a finishing touch of elegance.
Nutritional ingredients of Pineapple
- Vitamin C Boost: Pineapple is rich in vitamin C, an essential nutrient that supports immune function, collagen production, and antioxidant defense.
- Bromelain Enzyme: This enzyme found in pineapple has anti-inflammatory and digestive properties, aiding in digestion and potentially reducing inflammation.
- Dietary Fiber: Pineapple contains dietary fiber, promoting healthy digestion and aiding in maintaining steady blood sugar levels.
- Manganese: This trace mineral is essential for bone health, metabolism, and antioxidant defense.
- Antioxidants: Pineapple contains antioxidants like beta-carotene and flavonoids, which help combat oxidative stress and support overall health.
- Vitamin B6: This vitamin is important for brain function, energy metabolism, and the synthesis of neurotransmitters.
- Low in Fat and Calories: Pineapple is low in both fat and calories, making it a guilt-free choice for satisfying your sweet cravings.
- Vitamins and Minerals: Along with vitamin C, pineapple provides vitamins like vitamin A, B vitamins (thiamine, riboflavin, B6), and essential minerals like potassium and copper.
- Hydration: With its high water content, pineapple contributes to hydration and aids in maintaining proper fluid balance.
- Skin Health: The vitamin C and antioxidants in pineapple can promote healthy skin by supporting collagen production and protecting against free radicals.
Serving Suggestions
- Summer Soirée Delight: Present the Pineapple Swiss Roll as the star of a summer gathering. Its refreshing flavors make it an ideal dessert for outdoor picnics, BBQs, and poolside parties.
- Afternoon Tea Elegance: Elevate your tea time with slices of Pineapple Swiss Roll. The tropical notes of pineapple complement a range of teas, from classic black to herbal blends.
- Festive Occasions: Introduce a touch of exotic flair to your holiday or special occasion feasts. The vibrant colors and flavors of the roll add a festive element to the dessert spread.
- Family Dessert Night: Involve your loved ones in assembling and enjoying the Pineapple Swiss Roll. It’s a delightful and interactive way to bond over baking and indulgence.
- Brunch Extravaganza: Include slices of Pineapple Swiss Roll as part of a lavish brunch spread. Pair them with fresh fruit, yogurt parfaits, and other breakfast delights.
- Elegant Dinner Parties: Impress your guests with a dessert that marries elegance and flavor. Serve the Pineapple Swiss Roll after a sophisticated dinner to leave a lasting impression.
FAQs of Pineapple Swiss Roll
- Can I use canned pineapple instead of fresh? Absolutely! Just make sure to drain the canned pineapple well before using it as a filling.
- How do I prevent the cake from cracking when rolling? Roll the cake gently and evenly while it’s still warm. Using a kitchen towel to guide the rolling helps prevent cracks.
- Can I make the cake ahead of time? Certainly. Bake the cake, roll it up with the filling, and refrigerate. This can be done a day in advance, giving you more time to focus on presentation.
- How do I store leftover Pineapple Swiss Roll? Refrigerate any leftovers in an airtight container. To retain freshness, consume within a couple of days.
- Can I customize the filling? Absolutely. Experiment with other tropical fruits or even a cream cheese filling for a twist on the classic.
As you savor the last crumbs of the Pineapple Swiss Roll, let its tropical essence linger on your palate. This delightful treat encapsulates the harmony of flavors, the joy of creation, and the beauty of sharing moments over a plate of sweetness. Whether enjoyed at a gathering, during a quiet moment, or gifted with love, the Pineapple Swiss Roll embodies the magic of culinary exploration and the warmth of connection.